Windows Errors? Fix Them Before They Spread
Repair common Windows errors and clear accumulated junk for a smoother, more stable PC - no reinstall needed.Free scan · no reinstallCrashes, No Sound, or Screen Glitches?
Random freezes, missing sound and display glitches usually trace back to one bad driver. Find and replace yours safely.Free scan · under a minuteAn automatic fish feeder mechanism with timer by using Arduino works best with an Arduino Uno or Nano, a DS3231 real-time clock, and a servo-operated gate that releases a calibrated portion at a scheduled time. The DS3231 keeps clock time through ordinary power interruptions, but food quantity still depends on the assembled hopper and dispenser.
A simple design separates the project into four jobs: keep time, detect a scheduled feeding event, move the actuator, and meter food. The Arduino handles the schedule and actuator control; the flap, disk, drum, or auger determines how much food actually reaches the aquarium.
Key takeaways
- An Arduino automatic fish feeder needs both a schedule, such as a DS3231 real-time clock, and a repeatable mechanical dispenser; the Arduino by itself does not measure food portions.
- The DS3231 is designed for clock-time schedules, offers two time-of-day alarms, and is specified by Analog Devices at ±2 ppm from 0°C to +40°C and ±3.5 ppm from −40°C to +85°C.
- A position-controlled micro servo is the simplest actuator for a light flap or slide gate, while a stepper motor is better suited to an indexed drum, pocket wheel, or auger.
- Servo power must be designed separately from logic power when necessary because Arduino’s official Servo documentation warns that servos can draw considerable current; the Arduino and servo supply still need a common ground.
- Food quantity must be calibrated with the final hopper, outlet, actuator linkage, and food because accurate timing does not guarantee accurate feeding.
What is the best automatic fish feeder mechanism with timer by using Arduino?
The most accessible automatic fish feeder mechanism with timer by using Arduino is an Arduino Uno or Nano connected to a DS3231 RTC and a small servo that briefly opens a flap, slide gate, rotary disk, or food outlet. A hopper holds the food, the RTC supplies the feeding time, and the servo moves the calibrated dispenser. A stepper motor with a driver is a more engineered alternative for an indexed drum or auger.
The important design distinction is between clock accuracy and feeding accuracy. A DS3231 can trigger the mechanism at the intended time, but the amount delivered still depends on pellet or flake size, hopper geometry, gate opening, actuator movement, vibration, dust, and moisture. The assembled feeder must therefore be calibrated with the exact food intended for the aquarium.
Recommended Free Tools
#1 Best Overall

- Programmable delay modes to control the relay timings, widely used at smart home, industrial control, automatic irrigation, indoor ventilation, protection equipment etc.
- Operating voltage: DC 6V - 30V, support micro USB 5V power supply. High level trigger: 3V - 24V. NO(Normally open) maximum load < AC 250V/10A, < DC 30V/10A. Timing range: 0.1s ~ 999mins (continuously adjustable).
- Built-in a diode to provide protection against accidental reverse polarity for the circuits.
- If no operation within 5 minutes, the digital tube of the relay board will turn off automatically. Pressing any button can wake it up.
- OP(conduction time) / CL(off time) / LOP(circuit times) can be set individually, and the parameters are mutually independent. All parameters are permanently saved once set. The functions and parameters can be reviewed or changed at a later time.
Which parts do you need to build an Arduino fish feeder?
A practical first prototype uses the following parts:
| Part | Purpose | Design note |
|---|---|---|
| Arduino Uno R3 board or Arduino Nano | Runs the schedule and controls the actuator | The Uno is convenient for a breadboard prototype; a Nano can make the final enclosure smaller. |
| DS3231 RTC module | Keeps the current date and time | Use this when feeding must occur at human-readable clock times such as 8:00 AM and 6:00 PM. |
| SG90-class position-controlled micro servo | Moves a flap, slide, disk, or small gate | Suitable only when the gate is light and the food path does not regularly jam. |
| Hopper or food container | Stores pellets or flakes | The hopper needs a lid and protection from splash and condensation. |
| Flap, slide gate, rotary disk, or drum | Controls the portion leaving the hopper | Food quantity depends on this mechanism, not merely on the servo angle. |
| Breadboard and jumper wires | Prototype the circuit | Use strain relief and protect all exposed connections from aquarium water in the finished feeder. |
| Regulated power supply | Supplies the Arduino and actuator | A servo may require a separate motor supply with a common ground to the Arduino. |
The Arduino Servo library is intended to control hobby servos; Arduino describes the library as allowing Arduino boards to control a variety of servo motors. The same documentation warns that servos can draw considerable power, so do not assume the Arduino board’s logic supply is automatically an adequate servo supply. Read the official Arduino Servo library documentation alongside the requirements of the particular servo.
An Arduino Uno R3 board is a natural controller choice for this build because the Uno is widely used in Arduino feeder examples and has enough I/O for an RTC, actuator, and optional display or sensor. Exact board revisions and Arduino-compatible alternatives can vary, so confirm the board’s electrical specifications before final wiring.
How do you connect the DS3231 timer to Arduino?
The DS3231 connects to the Arduino through I2C. In the common Uno arrangement documented by Adafruit, power the RTC module from 3–5 V, connect module ground to Arduino ground, connect SDA to A4, and connect SCL to A5. The default I2C address documented for the breakout is 0x68.
The Tool Desk
Outbyte PC Repair FREERepair Windows errors before they cause bigger problemsFix Now →Outbyte Driver Updater FREEFix the driver behind crashes, sound loss and screen glitchesFind Drivers →| DS3231 module connection | Arduino Uno connection |
|---|---|
| VCC | 3–5 V, according to the module’s documentation |
| GND | Arduino GND |
| SDA | A4 |
| SCL | A5 |
These Uno wiring details come from the Adafruit DS3231 Precision RTC hardware guide. Other Arduino boards can expose I2C on different pins, so use the board’s documented SDA and SCL pins rather than copying Uno pin numbers blindly.
Analog Devices specifies that the DS3231 counts seconds, minutes, hours, dates, and years, includes leap-year compensation through 2100, provides two time-of-day alarms, and maintains time from a battery-backed supply when main power is interrupted. The manufacturer specifies accuracy of ±2 ppm from 0°C to +40°C and ±3.5 ppm from −40°C to +85°C in the DS3231 datasheet and product information. Those figures describe the RTC clock, not the mass or volume of food dispensed.
Allow the RTC to complete its startup sequence before relying on the first reading. Analog Devices’ guidance on initializing accurate I2C real-time clocks says communication should be held off during the RTC’s initial power-up sequence. In practice, use the startup delay or initialization procedure recommended by the RTC library you select instead of assuming the first instruction after power-up can immediately read a valid device.
Rank #2
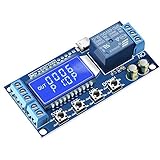
- Independent Parameters: OP/CL/LOP parameters can be modified and saved, and they are individual
- Auto Save: All setting parameters are automatically saved by power-fail
- LCD Display: the time delay relay module is designed with LCD display, can clearly and directly show the current mode and parameters
Which motor should you use for an Arduino fish feeder?
Use a position-controlled micro servo for the simplest flap or slide gate. Use a stepper motor when the design needs indexed rotation, fixed-volume pockets, a rotary drum, or an auger. Neither motor guarantees a portion by itself; the food path and calibration determine the result.
| Actuator | Best use | Advantages | Limitations |
|---|---|---|---|
| Position-controlled micro servo | Light flap, slide gate, or rotating disk | Simple control and easy angle adjustment | Portion varies with gate geometry, food flow, linkage, and jams. |
| Continuous-rotation servo | Rotary drum or auger requiring continuous movement | Convenient for turning a mechanism | Rotation is not directly position-controlled in the same way as a standard positional servo. |
| Stepper motor with driver | Indexed drum, pocket wheel, or auger | Repeatable commanded rotation and indexing | Needs a driver, additional wiring, coordinated control, and more mechanical design work. |
Arduino Project Hub documents both approaches: a goldfish feeder uses an Arduino Uno Rev3 and an SG90 micro servo, while a smart fish and pet feeder lists an Arduino Nano, DS3231 RTC, bipolar stepper motor, L298 driver, breadboard, jumper wires, and 3D-printed fabrication. These are implementation references rather than controlled benchmarks. The servo-based goldfish feeder example and stepper-based feeder example illustrate two valid design paths.
An SG90-class servo is a reasonable starting point only for a low-load gate. Clone specifications, torque, stall behavior, and current draw can differ by seller. Do not design the feeder so that the servo must remain stalled to hold back a large column of food. Reduce the load with a small outlet, a rotary disk, or a mechanism that mechanically closes rather than relying on motor torque alone.
How does a servo-gate fish feeder dispense food?
A servo-gate feeder stores food above a small opening and rotates a flap or slides a plate to expose the opening for a calibrated movement. The servo then returns the gate to a closed or safe position. The gate should close the food path positively so that pellets cannot continue flowing after the timed event.
Flap or slide gate
A flap or slide gate is the fastest design to prototype. A short movement exposes the outlet, and the return movement closes it. The main weakness is that free-flowing food can continue falling after the opening is nominally closed. A narrow, smooth outlet and a gate that overlaps the opening help, but the final geometry must be tested with the intended food.
What’s actually slowing this PC down?
Pick the symptom - the matching free tool is one click away.
Rotary disk or drum
A rotary disk or drum uses an opening or pocket that aligns with the outlet. A pocket can make the portion more repeatable than a free-flowing flap when the pocket volume is appropriate for the food. A servo can rotate a lightweight disk; a stepper is useful when the design requires several indexed positions.
Auger
An auger moves food through a screw-like channel and is better suited to a more engineered feeder. An auger is also more sensitive to pellet size, food dust, moisture, and friction. Available Arduino examples support custom-fabricated feeder mechanisms, but they do not establish a universal auger geometry or a guaranteed dose accuracy. A university design-and-fabrication reference discusses the construction of an automatic home-aquarium feeder, while a separate Arduino 3D-printed pet-feeder example demonstrates the relevance of custom printed parts.
Rank #3
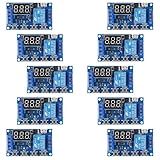
- Programmable delay modes to control the relay timings, widely used at smart home, industrial control, automatic irrigation, indoor ventilation, protection equipment etc.
- Operating voltage: DC 6V - 30V, support micro USB 5V power supply. High level trigger: 3V - 24V. NO(Normally open) maximum load < AC 250V/10A, < DC 30V/10A. Timing range: 0.1s ~ 999mins (continuously adjustable).
- Built-in a diode to provide protection against accidental reverse polarity for the circuits.
- If no operation within 5 minutes, the digital tube of the relay board will turn off automatically. Pressing any button can wake it up.
- OP(conduction time) / CL(off time) / LOP(circuit times) can be set individually, and the parameters are mutually independent. All parameters are permanently saved once set. The functions and parameters can be reviewed or changed at a later time.
How should the Arduino fish feeder firmware work?
The firmware should read the RTC, compare the current time with the feeding schedule, actuate the dispenser once, return the mechanism to its closed position, and remember that the scheduled event has already been handled. Event de-duplication is essential.
A loop that checks only the current hour and minute can trigger repeatedly during the entire scheduled minute. Store a handled-event key such as the date plus scheduled feeding time, or otherwise mark the event complete until the clock moves beyond that event.
initialize Arduino pins
initialize servo or stepper driver
initialize I2C and DS3231 RTC
wait for RTC startup or library initialization
load or define feeding schedule

loop:
    read current date and time
    if current time matches a scheduled feeding event
       and this event has not already been handled:
           actuate the gate, drum, or auger
           return mechanism to its safe, closed position
           record the event as completed
    perform optional low-food, jam, or status checks
For fixed elapsed intervals, an Arduino program can use millis(). An RTC is the better fit when the fish must be fed at clock times such as 8:00 AM and 6:00 PM or when the schedule must remain understandable after a power interruption. If power-loss recovery matters, decide whether the feeder should reconstruct the last completed event from stored state, skip an expired event, or feed at the next scheduled time. The correct policy depends on the aquarium and feeding plan.
How do you calibrate the amount of food an Arduino feeder dispenses?
Calibrate the assembled feeder with the exact food before leaving it unattended. No universal servo angle, step count, or motor run time can guarantee a particular portion because food size, shape, moisture, hopper fill level, and outlet geometry change the flow.
- Assemble the final hopper, outlet, actuator linkage, enclosure, and bowl position.
- Use the exact pellet, flake, or other food type intended for daily operation.
- Run at least 10 dispensing cycles into a dry measuring container or onto a scale.
- Record every cycle’s mass or volume, not only the average.
- Adjust the servo angle, gate opening, step count, or motor run time.
- Repeat the tests until both the smallest and largest observed portions are acceptable for the fish and feeding plan.
- Repeat the test with the hopper partly empty because food pressure and gravity can change as the fill level falls.
- Continue testing long enough for vibration, dust, bridging, or sticking to appear.
An academic Arduino-based catfish-feeder study describes a prototype using an Arduino Uno, DS3231 RTC, servo valve, LCD, and scheduled feeding, and reports regular feed output during that prototype’s testing. That result belongs to the authors’ particular design and should not be presented as universal portion accuracy for every DIY feeder.
How can you stop fish food from getting stuck?
Reduce jams by keeping moisture out, making the outlet close reliably, avoiding excessive hopper pressure, and testing the actual food through the completed mechanism. Flakes, round pellets, irregular pellets, dust, and damp food do not flow in the same way.
- Keep the hopper away from direct splash and condensation.
- Use a lid or enclosure that limits humid aquarium air entering the food container.
- Make the outlet short, smooth, and accessible for cleaning.
- Use a closing flap, slide, disk, or pocket rather than depending on a stalled servo to block food.
- Leave access for clearing a bridge or jam without disturbing the aquarium.
- For a stepper design, consider whether reverse or a short corrective movement can safely clear a blockage.
- Test when the hopper is full and partly empty.
Moisture protection and a closing outlet are reliability features, not cosmetic additions. The reviewed sources demonstrate custom hoppers and printed structures, but no universal moisture-resistance standard, food-compatibility standard, jam rate, or unattended-operation guarantee was established. Treat a prototype as unproven until it has operated for several days under realistic conditions.
Rank #4
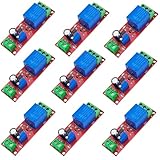
- Main Chip: NE555, Operating voltage: DC 12V, Size: 66*21*12mm, Weight: 9g
- The potentiometer to adjust the output frequency. which consist of high-precision potentiometer ( adjust the output frequency.), high frequency filter capacitor and with input power indicator, with the relay is energized light .
- Adjustable Delay timer switch can be used with other circuits to provide a time delay for other appliances. The delay time is adjustable (0 to 10 seconds), can control AC 220V/10A equipment (Maximum control equipment 2000W).
- It is long lasting and durable is perfect for SCM learning, electronic competition, product development, graduation design and vehicle equipment-delay to prevent car ignition, prevention of high sudden current to burn components and devices.
- Compatible with Arduino, Raspberry Pi, AVR, PIC, 8051
How should you power and test the feeder safely?
Power the Arduino and servo deliberately, share the electrical ground, and keep the electronics physically separated from aquarium water. A servo’s current demand can disturb the Arduino if both are powered through an inadequate supply, especially when the servo starts, changes direction, or encounters resistance.
Use a suitable regulated servo supply when the actuator load requires it, connect that supply’s ground to Arduino ground, and protect exposed connections with an enclosure and strain relief. Keep the hopper and outlet positioned so splash and condensation cannot run toward the electronics.
Before relying on the feeder during travel, test the complete assembly for several days. Check every scheduled event, confirm that the gate closes, inspect the portion range, try the intended food at different hopper fill levels, and look for dust, bridging, moisture, or servo heating. The available research does not support calling a DIY prototype fail-safe or guaranteed for unattended use.
Do these 3 things before closing this tab:
1Fix the driver behind crashes, sound loss and screen glitches2Clear out junk files and repair common Windows errors3Scan for outdated or missing drivers - takes under a minuteServo gate or stepper drum: which design should you choose?
Choose a servo gate when mechanical simplicity and a quick prototype matter most; choose a stepper drum or auger when indexed movement and a more controlled mechanical path justify additional hardware and fabrication.
| Decision factor | Servo gate | Stepper drum or auger |
|---|---|---|
| Mechanical simplicity | Usually the shortest path to a working prototype | Requires a more deliberate mechanism and driver |
| Portion repeatability | Depends strongly on free-flowing food and gate geometry | Indexed pockets can improve repeatability after calibration |
| Food compatibility | Often easier to adapt to small pellets and flakes | Pellet size, dust, moisture, and friction can strongly affect drums and augers |
| Power and electronics | Position signal plus suitable servo power | Stepper motor, driver, wiring, and coordinated phase control |
| Jam recovery | Needs an accessible gate and a way to clear the outlet | May support reverse or corrective movement, but the mechanism can be more complex |
| Fabrication effort | Container and simple linkage may be enough | Custom drum, auger, or 3D-printed parts are more likely |
| Humidity control | Requires an enclosed hopper and closing outlet | Requires the same protection, with extra attention to friction and food dust |
For a first aquarium build, start with the servo gate only if the food flows consistently and the portion is small. Move to an indexed drum or pocket wheel when repeated tests show that a flap cannot provide an acceptable portion range. Use an auger when the project’s mechanical design and maintenance access justify its greater sensitivity.
What are the limits of an Arduino automatic fish feeder?
An Arduino feeder can schedule a motor movement, but the research does not establish universal performance figures for DIY portion accuracy, jam frequency, battery life, moisture resistance, or unattended reliability. Project-specific demonstrations and academic prototypes show that these systems can be built; they do not make every mechanism equally reliable.
The RTC’s ±2 ppm or ±3.5 ppm clock specifications should not be confused with feeding-dose precision. A feeder can keep excellent time and still deliver inconsistent food. Conversely, a mechanically repeatable dispenser can still feed at the wrong time if the clock is configured incorrectly or loses its schedule. Validate the timer and the mechanism as separate subsystems, then test them together.
Best Value

- √ Product Specifications: Working Voltage DC 6-30V; Timing Range 0.01s-9999mins Continuously Adjustable.
- √Trigger Signal Source: Support High-Level Support, Low-level Trigger, Key Trigger Control, Switch Control (Passive Switch), Suitable for Most Applications.
- √Parameter Description: able to set different OP, CL, LOP parameters which are independent and saved separately; support viewing currently set parameters without affecting system operation.
- √More features: support UART data upload and parameter setting; with pause button, support one-key pause; with automatic sleep mode; with input reverse connection protection; with power-off automatic storage function.
- √NOTE: 1 Delay Relay Module is included, trigger cable or connector is not included and needs to be purchased separately.
For an optional custom enclosure, hopper, drum, or auger, 3D printing is a reasonable fabrication path. A specific material or service should be selected only after considering humidity, food contact, cleanability, dimensional stability, and the printer’s capabilities. The available examples support the category-level relevance of 3D-printed parts, not a universal claim that any printed material is aquarium-safe or moisture-proof.
Frequently Asked Questions
Can an Arduino dispense fish food at a set time?
Yes. An Arduino can dispense fish food at a set time when it reads a real-time clock such as the DS3231 and controls a servo, stepper, or other actuator. The Arduino schedules the event, but the mechanical dispenser must be calibrated separately for consistent portions.
What RTC module is best for an Arduino fish feeder?
A DS3231 is the strongest choice for an Arduino fish feeder that must follow daily clock times. The DS3231 is battery-backed during ordinary main-power interruptions, provides two time-of-day alarms, communicates over I2C, and is specified at ±2 ppm from 0°C to +40°C by Analog Devices.
What motor should you use for an Arduino fish feeder?
A position-controlled micro servo is usually the simplest motor for a small flap or slide gate. A stepper motor with a driver is preferable for an indexed rotary drum, fixed-volume pocket wheel, or auger, but the portion still depends on the food path and calibration.
How do you calibrate the amount of food an Arduino feeder dispenses?
Calibrate the completed hopper and dispenser with the exact food, run at least 10 cycles into a container or onto a scale, record every portion, adjust the gate angle or motor movement, and repeat with the hopper partly empty. No universal servo angle or run time guarantees a specific portion.
The Bottom Line
The most dependable starting point is an Arduino Uno or Nano, a DS3231 RTC, and a lightly loaded servo-operated gate with a positively closing outlet. Build the mechanical dispenser around the actual food, calibrate at least 10 cycles under different hopper conditions, protect the food and electronics from humidity, and test the complete feeder for several days before trusting it.
Quick Recap
Product prices and availability are accurate as of the date/time indicated and are subject to change. Any price and availability information displayed on Amazon at the time of purchase will apply.