Free tools Windows power users keep installed
One-click scans. No signup required.
To examine a fish gill, lift the operculum and inspect the arches and filaments beneath it; remove the operculum with scissors only if you need more access. To remove an arch, carefully cut its upper and lower attachments while protecting the filaments. For classroom microscope work, mount a small piece of filament in water and begin at low power.
This is a supervised biology activity, not a way to diagnose a pet fish. Use suitable protective equipment, follow your school or laboratory’s tool, specimen, and cleanup rules, and have a teacher supervise sharp-tool use.
Key takeaways
- The operculum is the external cover over the gill cavity. Beneath it are the gill arches, rakers, and filaments; small lamellae are found on the filaments.
- Lift the operculum to inspect the gills. If removing an arch, cut its attachments carefully rather than pulling on the delicate filaments.
- For a basic classroom wet mount, place a small piece of filament on a slide with water and a coverslip. Start at low power and increase magnification as appropriate to the microscope and learning goal.
- A dissecting microscope is suited to viewing gill tissue in a dish; a compound microscope is used for a thin slide preparation.
- Gill form varies among fish. Record the specimen’s name if known and describe what you observe rather than assuming every fish matches a diagram.
- Wear appropriate PPE, use tools only as instructed, and follow local procedures for cleaning equipment and disposing of biological material.
What parts of a fish gill will you see?
The operculum is the cover over the gill cavity. Lifting it reveals the gills, including the arches that support filaments. Rakers are attached to the arches, and the small lamellae are on the filaments. The exact appearance and counts can vary by species.
| Structure | Where to find it | What to observe |
|---|---|---|
| Operculum | External cover over the gill cavity | Its position and how it covers the gills |
| Gill arch | Within the cavity beneath the operculum | Its curve, attachments, and the structures it supports |
| Gill rakers | Attached to the arch | Visible shape and spacing |
| Gill filaments | Project from the arches | Arrangement and condition; these can be examined in a small slide preparation |
| Lamellae | Small structures on the filaments | Details visible in an appropriate microscope preparation |
For a classroom fish-head dissection, Cambridge International describes four gill arches on each side of its specimen; do not treat that count as universal for all fish. The Cambridge International teaching pack and the WJEC biology teachers’ guide identify arches, rakers, and filaments as structures for observation.
Quick wins for a faster PC:
Repair Windows errors before they cause bigger problemsFix Now →Scan for outdated or missing drivers - takes under a minuteDriver Scan →#1 Best Overall

- 30 Pieces in carrying case - Everything you need to practice techniques and dissecting skills.
- Premium grade stainless steel dissection kit is perfect for students, teachers, artists and other professionals looking to perform their work safely, and effectively.
- Based on usage research – We have select most needed and usually used instruments for most cases you will have. So, whatever you need to do, you will find needed tool.
- Easy to clean - You can boil them or swab by alcohol, or sterilizer, with no risk of damage to your instruments.
- Best match – Our goal is to provide what you need at the lowest cost but also the highest quality. We know when you find high value in your purchase you will look to us for all your dissection needs.
What do you need for a fish-gill dissection?
Typical supplies include a suitable fish specimen or fish head, a clean dissection tray, scissors, forceps, and appropriate protective equipment. For microscope work, have slides, coverslips, and a microscope suited to the observation. The exact setup depends on the specimen, activity, and local rules.
- Fish specimen or fish head appropriate for the lesson
- Clean, stable dissection tray
- Gloves, eye protection, and a lab coat or apron when required
- Scissors and forceps
- Slides and coverslips for a wet mount
- Dissecting or compound microscope, as appropriate to the task
- Waste bin and cleaning supplies required by the facility
A fish dissection kit may be useful if a class does not already have suitable equipment. Kit contents vary, so check what is included and follow local requirements for the specimen and tools. A kit is optional; the University of Florida IFAS fish anatomy lesson lists a dissection kit and pan among example materials.
Do not assume that every activity requires a scalpel. If sharp tools are used, an instructor should demonstrate safe handling and supervise learners. Cambridge International advises controlled cuts away from the body and having teachers decide whether learners are ready to handle scalpels.
How do you dissect a fish gill?
For a supervised classroom observation, first inspect the gills under the operculum. Remove the operculum only if more access is needed, then observe the gill structures before deciding whether to remove an arch or a small piece of filament.
The Tool Desk
Outbyte PC Repair FREEClear out junk files and repair common Windows errorsFree Scan →Outbyte Driver Updater FREEScan for outdated or missing drivers - takes under a minuteDriver Scan →1. Prepare and secure the station
Set the specimen on a clean, stable tray. Wear the PPE required by your school or laboratory and check for relevant material allergies before the activity. Keep tools under control, and have an instructor demonstrate their safe use before sharp instruments are distributed. Do not eat or drink in the work area.
Rank #2

- PROFESSIONAL-GRADE PRECISION: Medical-grade dissection instruments are crafted from certified German stainless steel, precisely weighted and balanced for optimal control during extended procedures, maintaining surgical sharpness and resisting corrosion, purpose-built for middle and high school anatomy and biology
- COMPREHENSIVE ANATOMY LAB SOLUTION: Complete 33-piece set includes 3 surgical scalpel handles with 20 sterile blades, precision scissors, specialized forceps, tissue clamps, and tissue probes for middle and high school anatomy and biology coursework
- GERMAN ENGINEERING EXCELLENCE: Precision-machined handles fit standard surgical blades for a secure, wobble-free fit during dissection and are compatible with multiple blade contours. The handles use the same certified German stainless steel found in professional surgical settings
- ORGANIZATION & PROTECTION: Premium microfiber lining and individual instrument slots with elastic retention prevent movement during transport and protect fine cutting edges, with specialized compartments for blades and small components
- LIFETIME PROFESSIONAL GUARANTEE: Every BioPrecision Advanced Kit is backed by our unconditional lifetime guarantee. If any instrument fails to perform to professional standards, we will replace it immediately
Follow the facility’s written procedures for cleaning equipment, sanitizing the station, and disposing of the specimen. The Cambridge International teaching pack provides classroom guidance on PPE and supervised tool handling.
2. Expose the gill chamber
Set the fish head or specimen on the tray. Lift the operculum with forceps to inspect the gills. If the activity requires fuller access, remove the operculum with scissors. Observe the arches and the filaments they support before removing tissue.
The Western Australia Department of Primary Industries and Regional Development fish-dissection lesson describes lifting the operculum to examine the gills.
Outdated Drivers Are Slowing You Down
One free scan finds every outdated or missing driver and matches the right update for your exact hardware.Free scan · exact hardware matchPC Slower Than It Used to Be?
A free scan shows the junk files, broken settings and background clutter dragging Windows down - then fixes them in one click.Free scan · Windows 10 & 113. How do you remove a fish gill arch?
If the lesson calls for an arch specimen, cut through its upper and lower attachments carefully. Lift the arch without pulling on the filaments, which can be damaged during removal.
- Open the operculum enough to see the gills and identify the arch to examine.
- Observe the arch and its filaments before removal.
- With scissors, carefully cut the upper attachment of the selected arch.
- Carefully cut the lower attachment.
- Lift the arch gently, freeing remaining connective tissue without tugging on the filaments.
- Place the specimen on the tray or in a dish for examination.
Use tools only as directed by the instructor, and do not force the arch free. Cambridge International’s fish-head dissection teaching pack describes cutting the arch attachments while taking care not to damage the filaments.
Rank #3

- Comprehensive Kit: The AmScope Microscope Slide Preparation Kit includes 22 essential tools for all your slide preparation needs
- Starter Kit: This microscope slide kit is ideal for beginners—or professionals—using slides for microscopes to prepare and analyze samples
- Kit Contents: Our microscope accessories include Eosin Red and Methylene Blue stain powders, tweezers, a swab, 5 blank microscope slides and cover slips, 5 prepared slides, ID stickers, and more
- Versatile Tools: Additionally, this science kit comes with tools that allow for easy manipulation of samples when preparing a slide
- About AmScope: We have the industry's leading collection of microscopes, microscope cameras, accessories and other related products
4. Observe and record the gill
Identify the arch, attached rakers, and filaments. Record the species or common name if known, along with what you actually observe. A dish and dissecting microscope can be used to examine gill tissue; use the method appropriate to the class objective rather than treating a classroom observation as a fish-health diagnosis.
How should you label and interpret the gill?
Label the operculum on the specimen, then identify the arch, rakers, and filaments. If the microscope preparation allows it, note the lamellae on the filaments. Add a clear orientation note to any drawing or photograph so the observed structures can be identified later.
Describe what is visible without assuming counts or arrangements apply to every fish. The Cambridge International teaching pack describes four arches on each side of its fish-head specimen, while other specimens may differ. Record the specimen name if known and follow the lesson’s reference materials.
Which microscope should you use to see fish gills?
Use a dissecting microscope to view gill tissue in a dish. Use a compound microscope for a thin slide preparation. The appropriate choice depends on the specimen preparation and learning objective; there is no universal magnification setting for every activity.
| Method | Preparation | Suitable observation |
|---|---|---|
| Unaided view | Gill in the cavity or on a tray | General arrangement of arches and filaments |
| Dissecting microscope | Gill tissue in a dish | Gross tissue inspection |
| Compound microscope | Thin wet mount on a slide | Small structures in the prepared sample |
The Victoria Fisheries Authority fish health management guidance distinguishes examining gill tissue in a dish under a dissecting microscope from using a slide preparation for higher magnification.
Rank #4
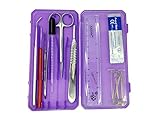
- ✅ FOR BIOLOGY STUDENTS & TEACHERS - Why should beginners start with a mediocre dissection kit? These tools are not props, they’re designed for extreme precision, thorough dissections, and easy to clean and store in hard plastic autoclavable case.
- ✅ TEACHER APPROVED TOOLS - High-school & college teachers recommend this dissection kit for its collection of the most useful and needed tools for biology lessons. Made with 100% premium stainless steel that’s long-lasting and easy to maintain. Stainless-steel scalpel handle and 5 blades to perform more dissections and lot of T-pins.
- ✅ MORE PRECISE DISSECTIONS - Most biology kits include only the most basic instruments, no extras. This kit contains 12 T-pins to help you perform more precise dissections and 5 #22 scalpel blades that are easy and safe to replace, even in the middle of a dissection.
- ✅ EASY TO PACK AROUND - As a student you’ve got more than enough to remember and bring with you to and from campus. Your personal biology kit shouldn’t weigh you down. These tools fit into a slim, semi-transparent case that slides into the side pocket of your backpack for easy transport.
How do you prepare a fish gill for a microscope?
For a basic classroom filament wet mount, place a small piece of filament on a slide with water and a coverslip. This is a teaching preparation for observation, not a standalone fish-health diagnosis.
Recommended Free Tools
- Cut a small piece of filament as directed by the instructor.
- Place it on a clean slide.
- Add two drops of water and place a coverslip over the sample.
- Begin viewing with the microscope’s low-power setting, then increase magnification as appropriate to the microscope and learning objective.
- Record observations and any preparation artifacts separately.
The WJEC biology teachers’ guide describes a filament wet mount using water and a coverslip, beginning with low-power objectives. This classroom method is distinct from fish-health preparations: the FAO tropical fish health training report describes an arch-based wet mount and specifies freshwater for freshwater fish or 1–2% saline for saltwater fish. Use the method and medium appropriate to the specific protocol; do not combine these instructions as though they are interchangeable.
What specimen and method should you choose?
Choose the preparation according to the goal. A classroom anatomy lesson, a fish-health examination, and chemical-analysis sampling are different activities with different handling requirements.
| Activity | Preparation and purpose | Important distinction |
|---|---|---|
| Classroom anatomy observation | Inspect gills beneath the operculum; remove an arch only if the lesson calls for it | Follow classroom supervision and cleanup rules |
| Classroom filament wet mount | Place a small piece of filament on a slide with water and a coverslip | Use the microscope instructions and lesson objective |
| Fish-health examination | May involve tissue in a dish or a slide preparation, depending on the objective | Use the relevant fish-health protocol and qualified interpretation |
| Chemical-analysis sampling | Collect and store samples as required by the analytical laboratory | Prevent contamination and follow analyte-specific laboratory requirements |
The Queensland Department of Environment, Science and Innovation chemical-analysis procedure addresses clean tools, labeled storage, and contamination control for analytical samples. Those requirements are not interchangeable with ordinary classroom cleanup or diagnostic microscopy.
What are the most common mistakes?
- Pulling on the filaments: Observe the tissue first and cut arch attachments carefully if removal is needed.
- Removing the operculum unnecessarily: Lift it to inspect the gills; remove it with scissors only when more access is needed.
- Assuming one wet-mount method fits every purpose: A classroom filament mount with water and a fish-health preparation may use different methods.
- Starting at high microscope power: Follow the teaching guide and microscope instructions; begin at low power for the classroom filament wet mount.
- Assuming every fish matches a diagram: Record the specimen name if known and describe what is present.
- Treating a classroom slide as a diagnosis: A teaching observation is not a substitute for a fish-health examination and qualified interpretation.
- Ignoring cleanup: Clean reusable equipment and the tray, sanitize the work area, and dispose of material under applicable institutional and local rules.
How should you clean up and dispose of the specimen?
After the activity, clean reusable tools and the tray, sanitize the station, and dispose of dissected material promptly according to the school’s or laboratory’s approved procedure. Waste-handling rules vary by location and institution, so do not treat one teaching resource’s disposal instructions as universal.
Best Value

- Microscope for Adults Professional Provides WF25X Eyepiece for use Alone or with a 2X Lens,and with 4x 10x 40x Objective Lenses,The Adjustable Dual LED Light of the Kids Microscope is Durable and Can Provide a Bright Enough Light Source for a Long Time to Make the 40x Objective Lens Imaging Clearer and More Precise. Microscope for Kids 8-12 Provides 6 Magnification Settings,100X,250X,1000X,200X,500X,2000X.Microscopes is Easy to use,of great Quality,very Sturdy and well-built
- Compound Microscope for Adults Uses a Metal Frame,which is Sturdy,Enduring,not Easy to scratch,high Quality.Stereo Microscope for Kids 8-12 can accurately focus, quickly find the image, ensure precise zoom and avoid blurry pictures.Kids Microscope for 8 Year Old Has High-quality Optics with Clear,Bright and Clean Lenses,making the Images Clearer and Sharper with Proper Lighting
- Microscopes for kids Features Adjustable (1-8 levels) Top Incident Light and Bottom Transmitted Light,top Incident Light Can Illuminate Opaque Objects Such as coin,jewelers Loupe,etc.Bottom Transmitted Light Can Illuminate Translucent Specimens.Microscope kit for Kids 8-12 5-color Disk Aperture Can Increase Contrast,black out Ambient Light,or eliminate Infrared/Ultraviolet Radiation.Compound Microscope for adults Requires 3 AA Batteries (not included) or an AC Power Adapter (included)
- Microscope for Kids 8-12 Comes with a Complete Set of Accessories,Including a Cell Phone Adapter,a Beginner Experiment kit (11 Pieces such as Prepared Microscope Slides with Specimens Sets,blank Slides,droppers,tweezers,etc.),Instructions,meet All Your Biological Observation Needs.Professional Microscope for Kids 5-7 Uses a Shockproof and Drop-proof Packaging with a Simple and Reasonable Design,which is Easy to Store and Carry,and Can Ensure that all Spare Parts Are Fully Packed
- Kid Microscope are Able to Use Optical Elements to Magnify Tiny Objects Thousands of Times to Observe Their Structure or Organization and Help you Collect data.Microscope for Kids 9-12 Are Designed to Help Students/Kids/Adults/Beginners/Enthusiasts/Microbiology/Biology/Science Students Explore the Wonderful World of Life.Plant Microscope for Adults Are Suitable for Schools/Teaching/Homeschool/DIY Experiments/Demonstrations/Clinical Examinations/Laboratories and Advanced Applications
The University of Florida IFAS fish anatomy lesson directs users to rinse and sanitize reusable equipment and trays, dry and return equipment, and dispose of material appropriately. Follow your own facility’s rules for the specimen and any contaminated materials.
Is a fish-gill dissection suitable at home?
This article describes a supervised biology activity. A home activity is not automatically safe or appropriate: specimen handling, tool use, and disposal still need to follow applicable rules. Do not substitute kitchen tools or household cleanup methods for laboratory procedures.
A classroom gill observation is not a way to diagnose abnormal breathing, discoloration, parasites, or illness in a pet fish. Seek qualified fish-health advice when the purpose is diagnosis rather than biology instruction.
FAQ
How do you expose the gills under the operculum?
Place the specimen on a tray and lift the operculum with forceps to inspect the gills. Remove the operculum with scissors only if the lesson requires more access, and do so under appropriate supervision.
What tools do you need to dissect a fish gill?
A typical classroom setup uses a suitable fish specimen or head, a clean tray, scissors, forceps, and appropriate PPE. Slides, coverslips, and a suitable microscope are needed for a wet mount.
How do you prepare a fish gill for a microscope?
For a basic classroom filament wet mount, place a small piece of filament on a slide with two drops of water and a coverslip. Start at low power and increase magnification as appropriate to the microscope and learning objective.
Can a classroom gill wet mount diagnose fish disease?
No. A classroom wet mount is a teaching observation, not a standalone diagnosis. Fish-health examination requires an appropriate protocol and qualified interpretation.
The Bottom Line
Lift the operculum to inspect the gills, and remove it with scissors only when needed for access. If removing an arch, cut its upper and lower attachments carefully to protect the filaments. For a basic classroom wet mount, use a small filament piece with water and a coverslip, begin at low power, and follow your facility’s safety and cleanup rules.
Quick Recap
Product prices and availability are accurate as of the date/time indicated and are subject to change. Any price and availability information displayed on Amazon at the time of purchase will apply.