
Some links on this page are affiliate links: if you buy through them we may earn a commission, at no extra cost to you.
Most SPYPOINT camera problems come down to one of five things: insufficient or incompatible power, an incorrect or poorly formatted memory card, incomplete activation, weak cellular reception, or model-specific firmware. The fastest fix is not a factory reset or random accessory swap: test the camera at home, then follow the symptom-specific checks below in order.
Quick triage: match the symptom to the likely cause
Use this table before changing settings. It keeps you from treating a weak cellular signal like a dead battery, or replacing a working camera when the real problem is an incompatible memory card.
As an Amazon Associate I earn from qualifying purchases.
| What you see | Check first |
|---|---|
| The screen is blank, flickers, or the camera shuts off | Battery type, charge level, polarity, contacts, and the battery door |
| The camera takes photos, but nothing reaches the app | Activation, last communication, card, power, signal, and firmware |
| There is a “No signal” message | Network compatibility, antenna position, and installation location |
| “Invalid SD Card” appears | Correct card type and capacity, reinsertion, and a long format |
| The camera triggers constantly | Branches, grass, sunlight, reflective surfaces, heat sources, placement, and sensitivity |
| It works at home but stops working in the field | Antenna, physical damage, battery contacts, door seal, card, cellular coverage, and any metal security box |
Start with an at-home transmission test
Do not make the first test of a cellular SPYPOINT camera a trip into the woods. Activate the camera, power it on, trigger a photograph, and confirm that the image arrives in the SPYPOINT app before mounting it. Repeat the test after field installation. This catches activation, storage, power, and reception problems while the camera is still within easy reach.
- Identify the exact camera model and cellular-network variant.
- Activate it through the SPYPOINT app or account. Select the model and scan or enter the activation code or SIM number as directed.
- Install the correct batteries or fully charge the correct rechargeable pack.
- Insert a model-approved memory card.
- Turn on the camera and trigger a test photo.
- Verify that the photo arrives in the app and note the camera’s last communication time.
A SPYPOINT cellular camera does not send a photograph directly from the camera to your phone. It stores the image on the card, uses the cellular connection to transmit it through the service, and then makes it available in the app. A failure at any point in that chain can look like “no photos.”
Popular on Amazon
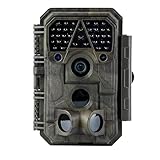
- Crystal-Clear 64MP Photos & 1296p HD Video – Stunning detail day or night, thanks to advanced image tech and a high-performance f/1.6 aperture lens.
- Lightning-Fast 0.1s Trigger Speed – Never miss a moment! Side sensors detect motion instantly, even for fast-moving wildlife, deer.
- Bright 100ft No-Glow Night Vision – Invisible 940nm LEDs and enhanced light capture deliver sharp nighttime footage without spooking animals.
- Smaller Files, Faster Playback – H.264 tech compresses videos (MP4/MOV) for quick downloads and seamless viewing on any device.
- 2.4" Color Display + User-Friendly Controls – Review footage on the spot with an intuitive menu and easy-access buttons.
1. SPYPOINT camera will not power on
Power is the first branch to eliminate. A camera may have enough energy to light a screen or capture an image but not enough to complete cellular transmission, so a partial power symptom does not rule out the batteries.
For models that use eight AA batteries
- Switch the camera off.
- Remove all batteries and inspect the contacts for corrosion, residue, or damage.
- Install eight new, non-rechargeable premium-brand lithium or alkaline batteries. Check every battery’s polarity against the markings in the tray.
- Make sure the tray is seated correctly and the battery door closes completely.
- Turn the camera on and repeat the at-home photo test.
Do not assume that seven good batteries and one questionable battery are sufficient. SPYPOINT notes that a single defective battery can prevent transmission even when the rest of the set is new. If you are replacing a set, lithium AA batteries for trail cameras can be a suitable option when they match your model’s instructions and operating conditions.
The Tool Desk
Outbyte Driver Updater FREEScan for outdated or missing drivers - takes under a minuteDriver Scan →Outbyte PC Repair FREERepair Windows errors before they cause bigger problemsFix Now →For rechargeable packs, external batteries, and solar models
Fully charge the pack according to the instructions for that particular model. SPYPOINT’s seasonal guidance notes that some packs may need up to 12 hours to charge, while certain internal batteries in solar-camera systems may require as much as 48 hours. Do not judge the charge time by a different SPYPOINT model.
There is an important exception to generic battery advice: rechargeable AA batteries are not recommended for the FLEX-M Solar Bundle because their voltage may prevent proper operation. That bundle uses its solar panel as the primary power source but may also use backup batteries or the LIT-22 pack, depending on the product configuration and instructions. Solar assistance does not mean every power requirement disappears.
The battery percentage shown in the app is not necessarily a live reading. It represents the battery level at the camera’s last successful communication. If the camera stopped communicating afterward, the app can continue showing an old percentage even though the current battery is depleted.
2. The camera takes photos but does not transmit them
First determine whether the camera is failing to capture images or failing to communicate them. Check the card for locally stored photographs if your model permits it. If photos are present on the card but absent from the app, concentrate on activation, power, signal, and communication status.
What’s actually slowing this PC down?
Pick the symptom - the matching free tool is one click away.
Check activation and app access
- Confirm that the camera appears in the correct SPYPOINT account.
- Check that the activation process was completed for the exact model and code or SIM number.
- Trigger a new photo rather than relying only on an old scheduled transmission.
- Open the camera’s status information and check the last communication date and time.
If the status says “This camera has not reported yet”, the device has not successfully communicated. That points you toward power, cellular reception, activation, card, or firmware checks rather than toward phone notification settings.
The current SPYPOINT app compatibility guidance lists iOS 15 and newer and Android 10 and newer. If your phone cannot run the mobile app, SPYPOINT also provides a web app with core functions such as viewing transmitted photos, checking camera status, and managing settings. Using the web app can help distinguish an app-compatibility problem from a camera-communication problem.
Check the card and power even when the camera captures images
Cellular transmission can place a greater demand on the power system than standby operation or a local photograph. Recheck the battery set, contacts, and charge level. Then inspect the memory card using the procedure in the next section. Finally, verify signal and firmware.
3. Fix a “No signal” problem
“No signal” is not the same as “no photos.” A camera may have a cellular connection but fail to transmit because of power, activation, card, or firmware problems. Conversely, a camera with a card and working trigger can still be unable to send anything when reception is absent.
Also popular on Amazon

- 𝐍𝐎𝐓𝐄: 𝐢𝐭 𝐢𝐬 𝐍𝐎𝐓 𝐜𝐨𝐦𝐩𝐚𝐭𝐢𝐛𝐥𝐞 𝐰𝐢𝐭𝐡 𝐡𝐨𝐦𝐞 𝐖𝐢𝐅𝐢, 𝐝𝐨𝐞𝐬 𝐍𝐎𝐓 𝐬𝐮𝐩𝐩𝐨𝐫𝐭 𝐜𝐞𝐥𝐥𝐮𝐥𝐚𝐫/𝟒𝐆/𝟓𝐆 𝐧𝐞𝐭𝐰𝐨𝐫𝐤𝐬, and 𝐝𝐨𝐞𝐬 𝐍𝐎𝐓 capable of real-time motion alerts or push notifications. The camera creates its own short-range Wi-Fi hotspot (𝐍𝐨𝐧-𝐂𝐞𝐥𝐥𝐮𝐥𝐚𝐫) for setup, and downloading files only. Wi-Fi range is up to 33–50 ft in open areas. The camera records automatically even when your phone is not connected. No subscription or monthly fees
- Upgraded Split Solar Panel Design: This trail camera features a Allows flexible placement design. Its angle can be manually adjusted to efficiently face the sun, regardless of seasonal changes or terrain. This greatly improves charging efficiency and minimizes sunlight blockage, making it suitable for all kinds of outdoor environments (32GB SD card included (pre-installed). No extra charge)
- Non-Stop Solar Power: Equipped with a high-capacity 6000mAh rechargeable power, this trail camera supports three charging modes: solar charging, Type-C charging, and rechargeable power. It allows for long-term continuous use. No more wasting money or climbing. It is the truly energy saving, and long-lasting solution for 24/7 backyard, farm, and deep-woods surveillance
- Easy & Smart App Control : This wifi trail camera pairs instantly via WiFi + Bluetooth with the user friendly “TrailCamGO” app, with a maximum connection range of 55FT (recommended within 10FT). Photos and videos can be send directly to your phone without removing the SD card. (As the wireless trail camera creates its own hotspot to connect with the phone, it does not support home Wi-Fi networks.)
- 4K & 64MP Ultra-Clear Imaging: With a high-resolution sensor and excellent low-light performance, this solar trail camera minimizes image and video blur or noise, enabling quick wildlife recognition and capturing every detail clearly.Ideal for birdwatching, spotting wildlife, and keeping an eye on your garden/home
- Turn the camera off and restart it.
- Confirm that the camera’s network variant is compatible with cellular coverage at the installation location.
- Check that the antenna is attached securely and reposition it as the model instructions recommend.
- Test the camera outdoors or near a window rather than deep inside a building.
- Compare reception in another nearby location. A small change in elevation or position can reveal whether the original spot is the problem.
SPYPOINT identifies the SPYPOINT CA-01 antenna as a possible reception aid for compatible devices. It cannot create coverage that the camera’s network does not support, so verify compatibility before buying an antenna. If the camera works outside a structure but not inside a steel enclosure, skip to the field-installation section below.
4. Resolve an “Invalid SD Card” message
Storage media is model-specific. Do not transfer a card from one SPYPOINT camera to another and assume it is supported.
SPYPOINT’s general guidance calls for a reputable-brand Class 10 SDHC card and a long format rather than a quick format. Capacity and physical format vary by model. For example, older LINK-MICRO guidance is narrower, specifying 2–32 GB SDHC media, while newer FLEX-M guidance supports Class 10 SDHC or SDXC microSD cards up to 512 GB. Those examples are not a universal rule; use the exact manual or support page for your model.
When replacing storage, choose a SPYPOINT-compatible microSD card or full-size card only after checking whether your camera requires microSD or standard SD. A microSD card inside an adapter is not automatically equivalent to a full-size SD card. SPYPOINT warns that adapters can slow performance and contribute to data loss.
Outdated Drivers Are Slowing You Down
One free scan finds every outdated or missing driver and matches the right update for your exact hardware.Free scan · exact hardware matchPC Slower Than It Used to Be?
A free scan shows the junk files, broken settings and background clutter dragging Windows down - then fixes them in one click.Free scan · Windows 10 & 11Card troubleshooting sequence
- Turn the camera off before touching the card.
- Remove and firmly reinsert the card.
- If the camera’s menu provides a format command, use that command.
- Otherwise, use the model-specific computer formatting procedure and perform a long format, not a quick format. Back up any photographs first because formatting erases the card.
- Insert the card, restart the camera, and trigger a test image.
- If the error remains, test a different reputable Class 10 card that meets the model’s physical-format and capacity requirements.
If the camera continues transmitting despite the error, SPYPOINT notes that the message can sometimes be a temporary glitch. If transmission also fails, treat the card as a serious suspect and test a known-compatible replacement.
5. Activate the camera correctly
Activation is completed through the SPYPOINT app or account, not simply by inserting batteries and switching the camera on. The usual sequence is to select the model, scan or enter the activation code or SIM number, power on the camera, trigger a photograph, and confirm that the test image reaches the app.
Use the exact model shown in the app. A camera that is powered on but not successfully activated may appear functional locally while never completing the service connection.
If the camera reports a SIM-related error, do not remove, handle, or reseat the SIM unless the official instructions for that specific model explicitly tell you to do so. SPYPOINT directs owners to customer support for SIM-related errors. This is also a good time to record the model, error message, last communication time, battery type, card specification, and firmware version before contacting support.
Free tools Windows power users keep installed
One-click scans. No signup required.
6. Update firmware without creating a new problem
Firmware files and installation steps are model-specific. Use the current firmware and instructions from the support page for the exact camera model; never use a file downloaded for a similar-looking SPYPOINT camera.
- Charge the camera substantially before starting. SPYPOINT’s troubleshooting guidance specifies at least 70% battery charge.
- Use the card type and formatting method required by the model.
- Do not rename, modify, or place the extracted firmware file in a different folder unless the model’s instructions require it.
- Do not remove the card, switch off the camera, or interrupt power during the update.
- Afterward, verify the firmware version in the SPYPOINT app or the camera’s information screen when that model supports the check.
Example: FORCE-PRO-S installation pattern
For the FORCE-PRO-S, SPYPOINT’s procedure uses a formatted SD card. The extracted firmware file is copied to the card’s root directory, the card is inserted into the camera, and the software update is started from the camera menu. This is an example of why instructions cannot be generalized: another model may use a different menu or file process.
Also popular on Amazon

- 【Ultra-clear Photos and Videos】36MP Still Images & 2.7K Videos. Thanks to premium optical lens and an advanced image sensor, and built-in 22Pcs 850nm low glow LEDs, this trail camera provides crystal clear images and amazing smooth 2.7K videos with sound in the daytime, low light or nighttime, combined with noise reduction speaker and 2.0” HD TFT Color Screen, which takes you into the world of wildlife.(This camera does not include an SD card.)
- 【Super Night Vision & Low Glow Infrared LEDs】The trail camera is equipped with powerful low glow infrared LEDs, features upgraded 850nm infrared technology, makes this game camera more stealth, which can show the night behavior of animals without disturbing them, encompasses adaptive illumination technology to avoid overexposure or over-dimmed, which can provide clear night images and videos in total darkness, delivers brilliant night vision up to 75ft.
- 【Fast 0.1s Trigger Time &130°Wide Angle】Once movements are detected, the lightning-fast trigger speed of less than 0.1s with 1 to 3 shots choice guarantees fast and accurate capture of each detected motion exposed to the field, never miss any animals that wander by this camera. 130° detection range to give you an expansive field view, indispensable for hunting, wildlife observation, farm monitoring, home backyard, plant growth observation, property security and surveillance.
- 【Easier Setup Than Ever】This hunting camera features a built-in 2.0-inch color screen and TV remote-style control buttons. No Wi-Fi or app is needed; the intuitive and easy-to-use interface allows for quick setup and instant playback, making it suitable for users of all ages. The included mounting strap and stand allow you to stabilize the camera in various scenes and at any angle. A comprehensive user guide helps you quickly get started using this hunting camera.
- 【IP66 Waterproof】KJK201 is designed to withstand extreme environments, thanks to the tightly integrated design of the camera body and high-quality rubber ring, ensuring that works normally from -22 °F to 158 °F, excellent quality can be used in deserts, rainforests, etc. The efficient PIR design works to reduce false triggers, boasting an impressive 17,000-image battery life! The smaller size makes them easier to conceal from theft/vandalism, and also much easier to carry out into the field.
If an update fails, return to the model-specific instructions rather than repeatedly trying random cards or files. Confirm the charge level, card format, file location, and exact model before contacting SPYPOINT.
7. Interpret screen, light, and error symptoms
Dim, flickering, or blank screen
These symptoms, especially when the camera switches off immediately, commonly point to insufficient power. Turn the camera off, install eight new non-rechargeable lithium or alkaline batteries with the correct polarity when the model uses eight AAs, or fully charge the appropriate rechargeable or external pack. Inspect contacts and the battery door at the same time.
Quick wins for a faster PC:
Clear out junk files and repair common Windows errorsFree Scan →Scan for outdated or missing drivers - takes under a minuteDriver Scan →“Modem” error
A modem error means the camera cannot communicate properly with its cellular modem board. Restart the camera once. If the error remains, contact SPYPOINT support rather than repeatedly opening the camera or attempting to manipulate the SIM.
“No signal” error
Confirm network and model compatibility, check that the antenna is attached, and test a better location. An antenna accessory cannot compensate for an unsupported network or an area without usable coverage.
8. Stop false triggers
Frequent unwanted photographs are usually a placement or configuration problem before they are a hardware problem. Inspect the detection zone for:
- moving branches, leaves, or tall grass;
- direct sunlight entering the detection area or lens;
- reflective surfaces;
- heat sources or rapidly changing warm surfaces; and
- an angle that allows the camera to detect motion outside the intended area.
Clear or reposition the source, change the mounting angle, and adjust sensitivity using the model-specific guidance. Test after each change so you know which adjustment helped. Switch the camera off during transport; movement in a vehicle or while carrying it can create unnecessary detections and drain the batteries.
9. When it works at home but fails in the field
A successful home test proves that the basic camera, card, activation, and transmission process can work. It does not prove that the field location has adequate reception or that the installation is not physically interfering with the camera.
Before leaving the camera unattended, inspect each of these areas:
- Antenna: attached securely and positioned correctly.
- Battery tray and contacts: no corrosion, residue, looseness, or damaged contacts.
- Battery door and seal: the door closes fully and protects the interior.
- Lens and housing: clean, undamaged, and unobstructed.
- SIM area: leave the SIM alone if there is an error; contact SPYPOINT support instead.
- Memory card: correct for the model, properly inserted, and correctly formatted.
- Location: adequate cellular reception at the actual mounting point, not merely at the vehicle or house.
Trigger another photograph after installation and confirm that it arrives in the app. If the camera has signal but no image arrives, check the last communication status and return to the power, card, activation, and firmware branches.
Security boxes can weaken reception
A steel security box can protect a camera from theft and damage, but metal may reduce wireless performance, particularly where reception is already weak. If signal quality drops after the camera is placed in a box, test the camera outside the box, reposition the installation, or use an antenna solution compatible with the model.
Also popular on Amazon

- [SIMPLE & RELIABLE TRAIL CAMERA FOR BEGINNERS] Designed for first-time users, this entry-level trail camera focuses on easy operation and dependable performance. The classic solid brown housing blends naturally into outdoor environments, making it ideal for wildlife monitoring and backyard use. With clear, straightforward controls, anyone can start using it in minutes—no technical experience required. A perfect choice for hunters, landowners, and beginners looking for a no-frills, easy-to-use trail camera.(8×AA batteries and SD card not included.)
- [Powerful 850nm Night Vision] Fully automatic IR filter, built-in 24pcs 850nm Infrared LEDs, this game camera can capture crisp black and white nighttime images for a wide range. In real nighttime wildlife monitoring scenarios, 850nm infrared night vision produces brighter, sharper images with less noise than 940nm, allowing you to clearly identify animals and details even in complete darkness.
- [UPGRADED INTEGRATED DESIGN – EASIER SETUP IN THE FIELD] Unlike traditional flip-open designs, the lens, screen, and controls of this trail camera are all on one side—making setup faster and more convenient. Easily adjust angles and preview shots during installation without repositioning the game camera.
- [IP66 WATERPROOF & BUILT FOR EXTREME OUTDOORS] Engineered for tough environments, this trail camera features a tightly sealed body and durable housing. It performs reliably in rain, dust, heat, or cold—ideal for long-term outdoor use in forests, farms, or backyards.
- [CLEAR 2K VIDEOS: 2025 NEW UPGRADED!] CEYOMUR trail camera catches impressive 36MP photos and records great 2K videos day and night, providing a vivid wildlife world, getting more details and experience. Since October 14, we have improved the appearance of the product, and the actual product is mainly based on the information on the page.(Battery and memory card not included.)
For a theft-prone installation, a model-compatible SPYPOINT security box, cable lock, or mounting arm can improve physical security and stability. Confirm fit for the exact camera before purchase, and test wireless performance after installing any metal enclosure.
One-variable-at-a-time recovery plan
If several things may be wrong, change only one variable between tests. Use this order:
- Confirm the model and cellular variant.
- Turn the camera off and correct the power source.
- Inspect contacts, the door, antenna, lens, and housing.
- Confirm the model-approved SD or microSD card and long-format it.
- Verify activation and app or web-app access.
- Test a photograph at home.
- Check signal and the last communication time at the field location.
- Install model-specific firmware only when needed, with at least 70% charge.
- Retest after each change.
This sequence makes the result useful: if the camera begins transmitting immediately after a card change, you have identified the likely cause instead of masking it with several simultaneous changes.
What to tell SPYPOINT support
If the problem persists, provide enough detail for support to reproduce the diagnosis:
Recommended Free Tools
- exact camera model and network variant;
- the complete error message;
- the last successful communication date and time, or confirmation that it has never reported;
- battery chemistry or rechargeable-pack model and approximate charge;
- card brand, physical type, capacity, and SDHC or SDXC classification;
- current firmware version;
- whether the camera captures photos locally;
- whether it works outdoors, near a window, or outside a security box; and
- what changed immediately before the failure.
Do not open the camera, manipulate a SIM, or install firmware from another model as a shortcut. Those actions can turn a diagnosable configuration problem into a hardware or recovery problem.
Printable SPYPOINT troubleshooting checklist
- Turn the camera off.
- Confirm the exact model and network variant.
- Install fresh, correct batteries or fully charge the correct pack.
- Check polarity, battery contacts, door, lens, and antenna.
- Use the model-approved Class 10 SD or microSD card.
- Long-format the card, using the camera’s format option when available.
- Confirm activation in the SPYPOINT app or account.
- Trigger and receive a test photo at home.
- Check field signal and last-communication status.
- Install only model-specific firmware, with at least 70% charge.
- Change one variable at a time and retest.
- Contact SPYPOINT support with the model, error, communication time, card, battery, and firmware details if the problem continues.
Frequently Asked Questions
Why does my SPYPOINT app show battery power even though the camera is not working?
The app’s battery percentage is old, not necessarily live. SPYPOINT reports the battery level from the camera’s last successful communication. If the camera lost power afterward, the app may still show the earlier percentage.
Can I use any SD or microSD card in a SPYPOINT camera?
No. Card capacity and physical format vary by model. Older LINK-MICRO guidance is narrower than newer FLEX-M guidance, which supports certain Class 10 SDHC or SDXC microSD cards up to 512 GB. Check the exact model manual, and do not assume a microSD card in an adapter is equivalent to a full-size SD card.
Should I remove the SIM card when my SPYPOINT camera reports a SIM error?
No. Do not remove or reseat the SIM for a SIM-related error unless the official instructions for that model specifically permit it. SPYPOINT directs owners to customer support for SIM errors.
Do these 3 things before closing this tab:
1Clear out junk files and repair common Windows errors2Scan for outdated or missing drivers - takes under a minute3Repair Windows errors before they cause bigger problemsWhy does my SPYPOINT camera work at home but not in the field?
The home test may have confirmed the camera and account but not the field location. Recheck the antenna, actual cellular coverage, battery contacts, card, door seal, and lens. If the camera is inside a steel security box, test it outside the box because metal can weaken wireless performance.
The Bottom Line
Most SPYPOINT failures become easier to solve when you separate the four systems involved: power, storage, cellular communication, and the app account. Start with a controlled home test, use only model-compatible batteries and memory media, and treat “no signal,” “invalid SD card,” and “modem” as different problems.
Before leaving the camera in the field, confirm one real photograph reaches the app from the final mounting location. If it does not, record the exact error and last communication time, then contact SPYPOINT rather than removing the SIM or using firmware intended for another model.





Leave a Reply